Install Agent
Once Linux for nilbox is installed, you can select and install an agent in nilbox. This document walks through the installation process using OpenClaw as an example.
Before You Start
- The nilbox desktop app must be installed.
Linux for nilboxmust be installed on first launch.- A nilbox account is required to install apps.
Installation Flow
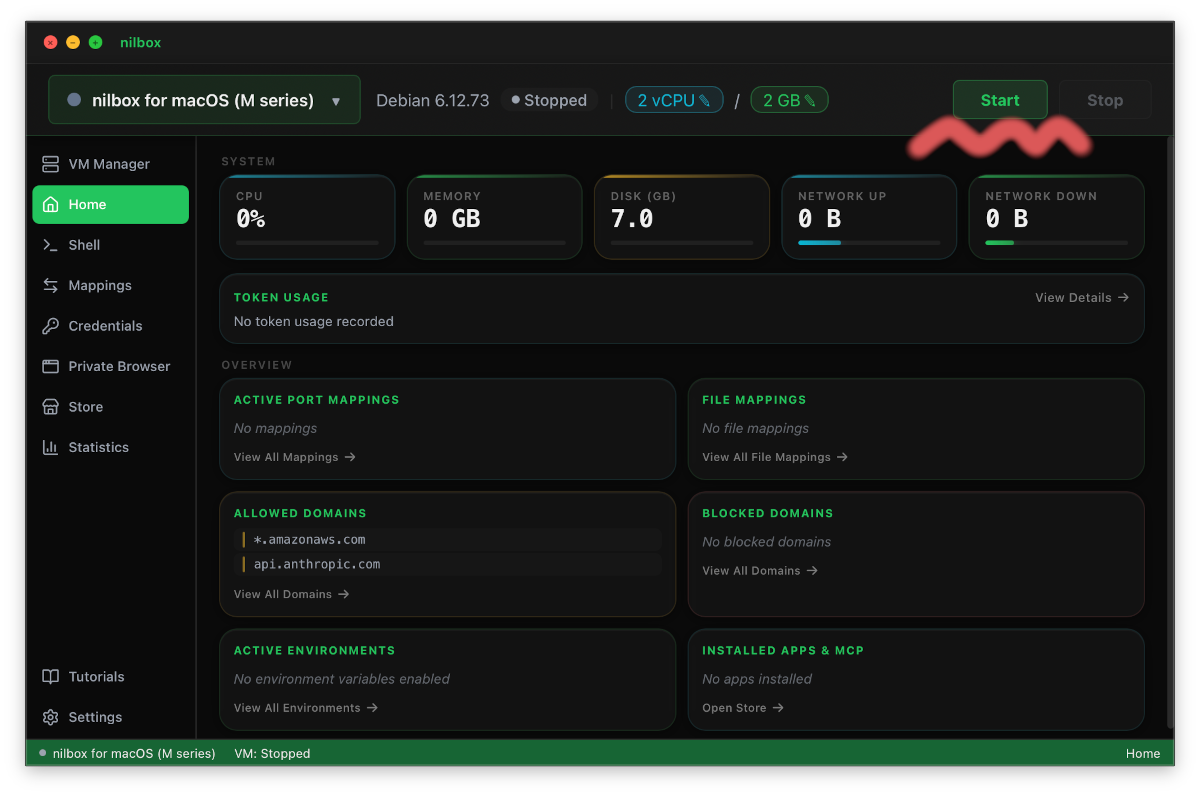
- Click the
Startbutton in the upper right of the nilbox screen to start the runtime.
-
Select the
Storemenu from the left sidebar.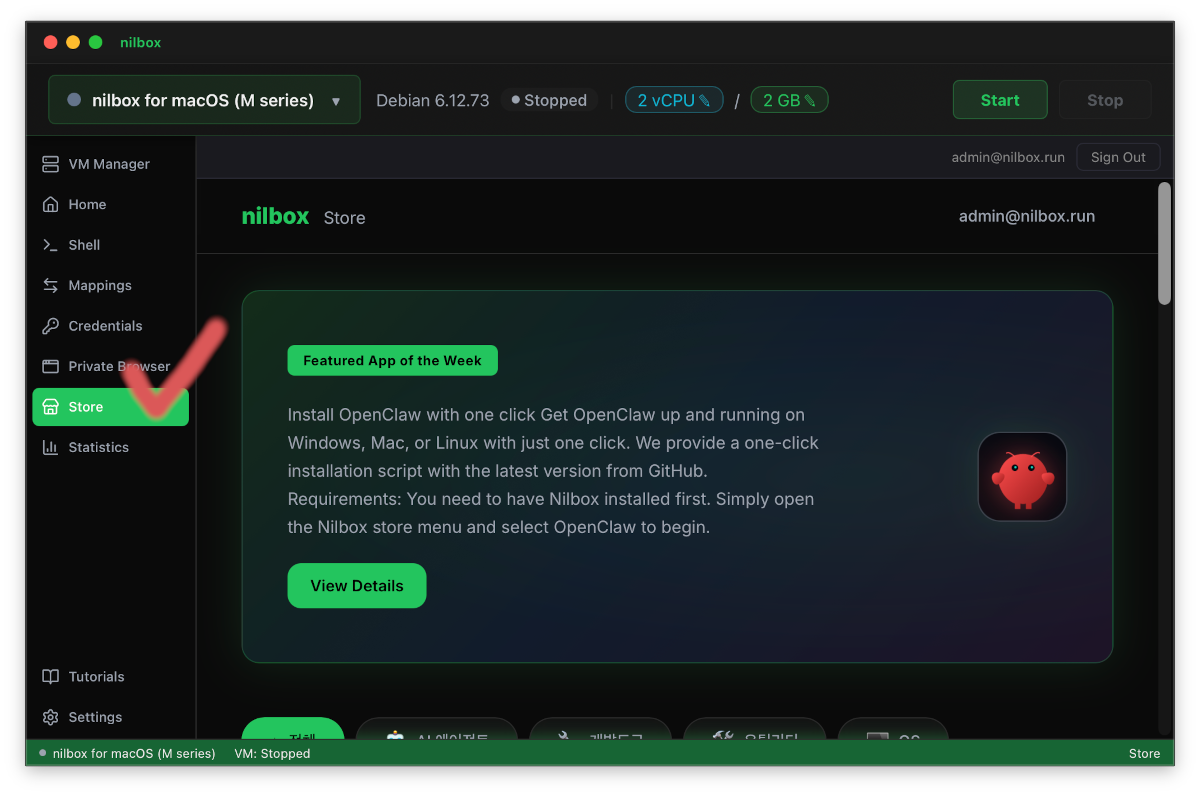
-
Find and select
OpenClawfrom the store list.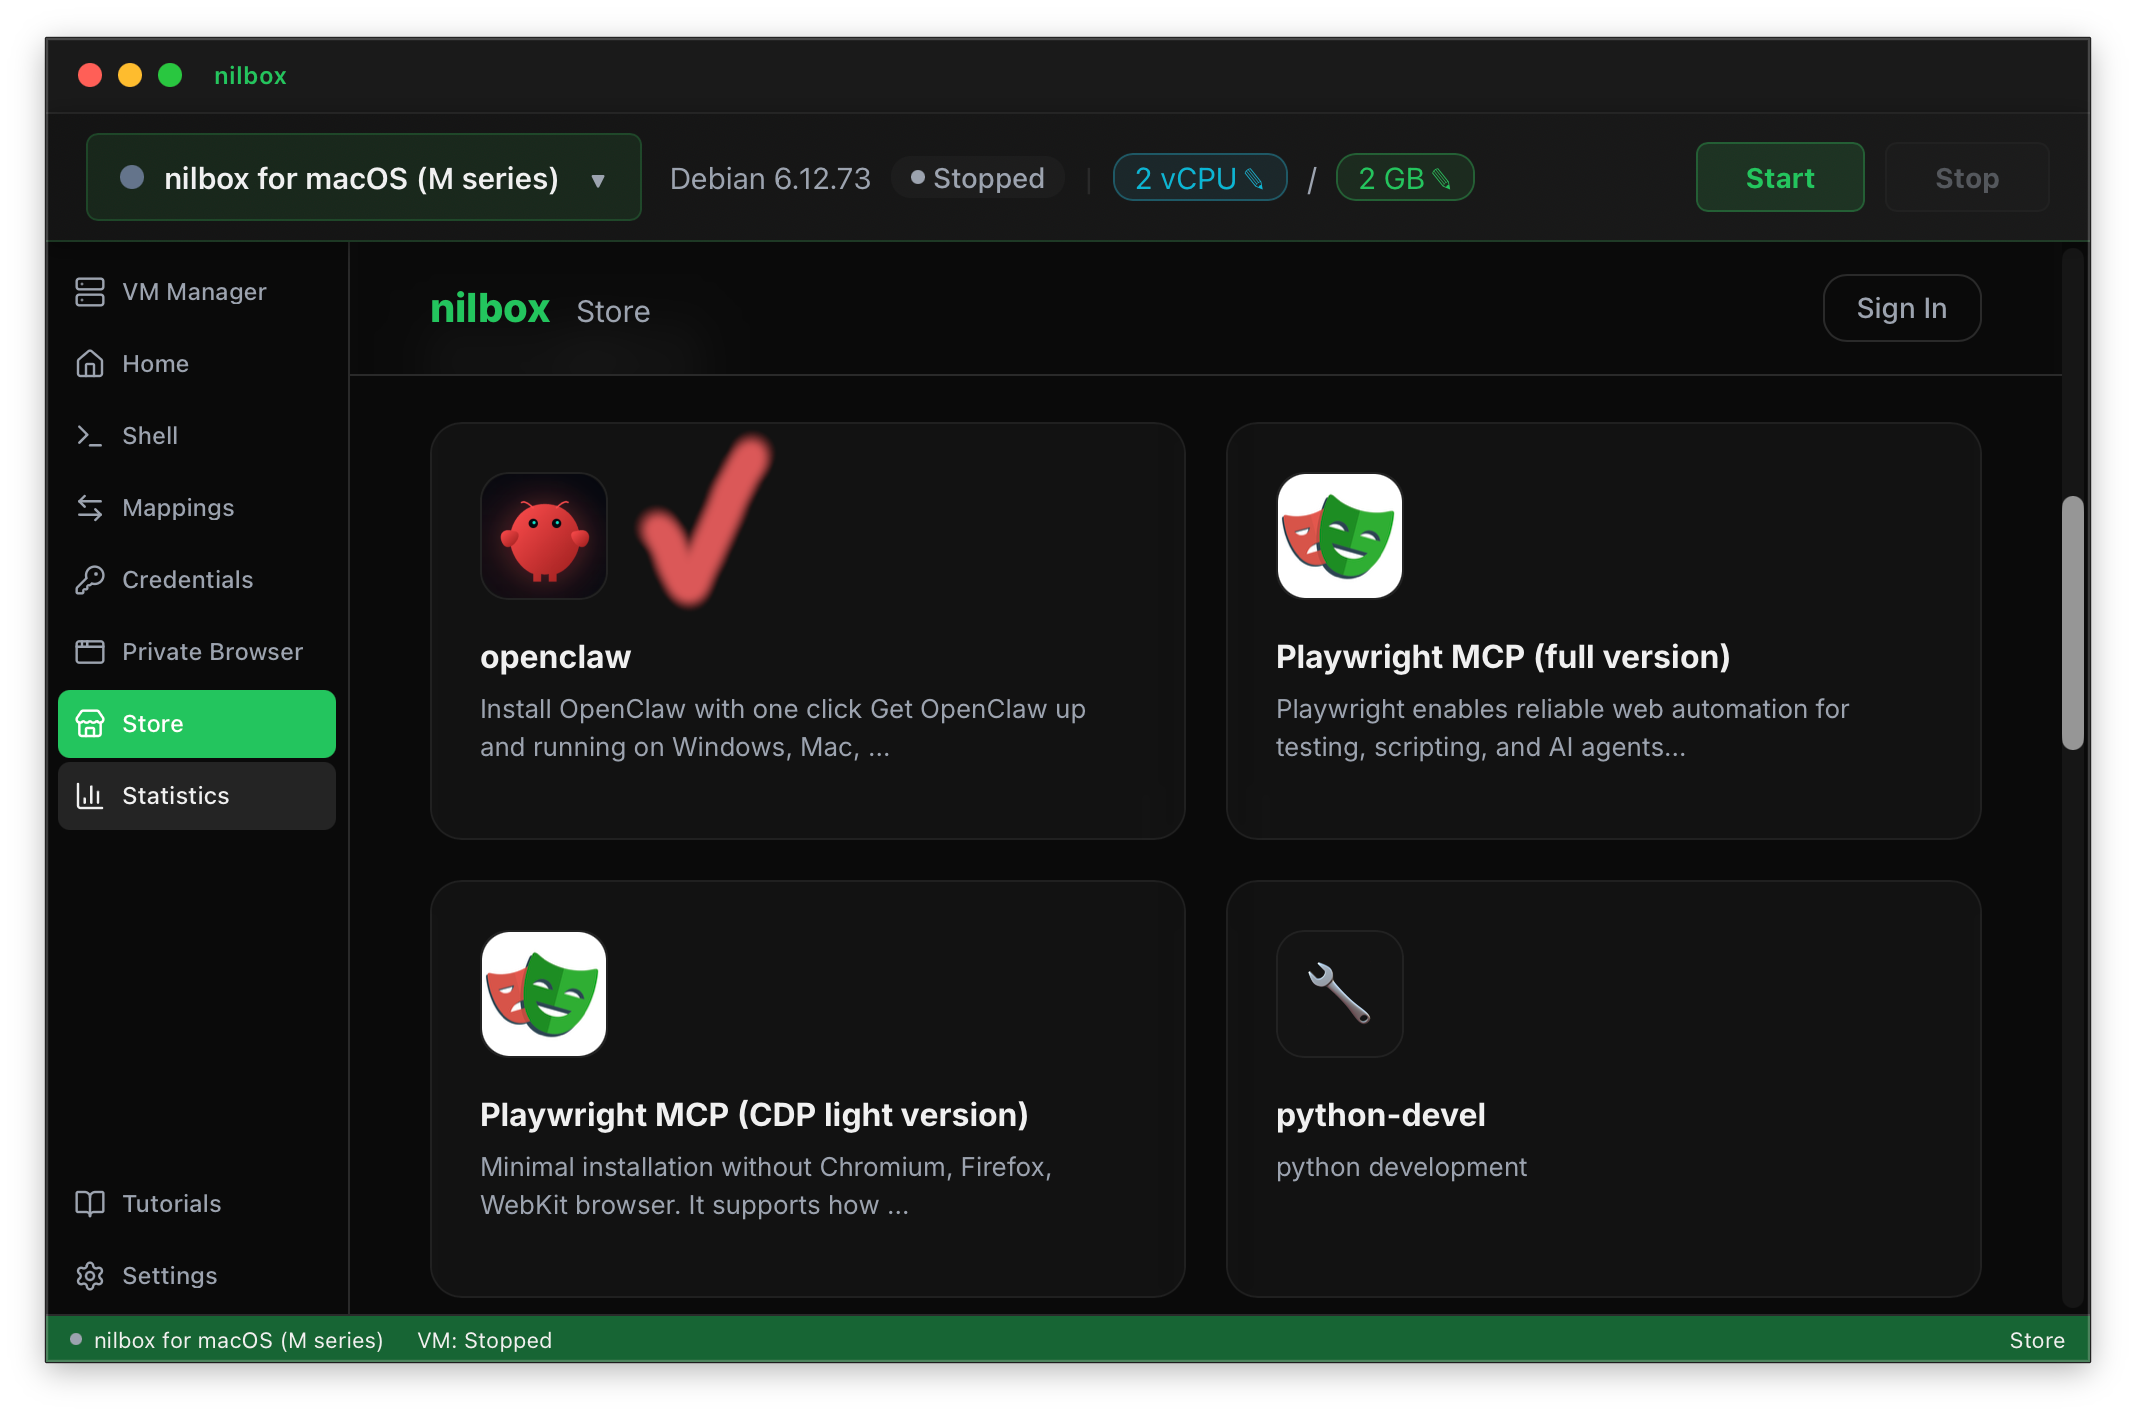
-
Sign up for an account to proceed with app installation.
-
Click the
Installbutton to begin installation. -
The installer runs automatically and is shown on screen.
Video Guide
What Happens Next
- Continue the
OpenClawinstallation by following the installer instructions. - Once installation is complete, you can use the agent in nilbox.
Verify Installation
If you see the following, installation has started successfully.
- Clicking the
Startbutton opens the nilbox runtime screen. - The
Storemenu is visible in the left sidebar. - You can navigate to the
OpenClawdetail screen in the store. - After clicking
Install, the installer runs automatically.
Related Docs
- Installation — Install the nilbox desktop app and
Linux for nilbox